
Magnetones Installation
Magnetones are easy for techs to install and quick and simple for the player to use.
PARTS - What you need
A saxophone that you are ready to overhaul
The backing magnet lives under the pad, so a technician will need to remove your pads to install this system.
Backing Magnets
Backing Magnets live under the saxophone pad and come in two sizes.
- Small Backing Magnets - for pads under 20mm (25/32")
- Large Backing Magnets - for pads 20mm (25/32") and over
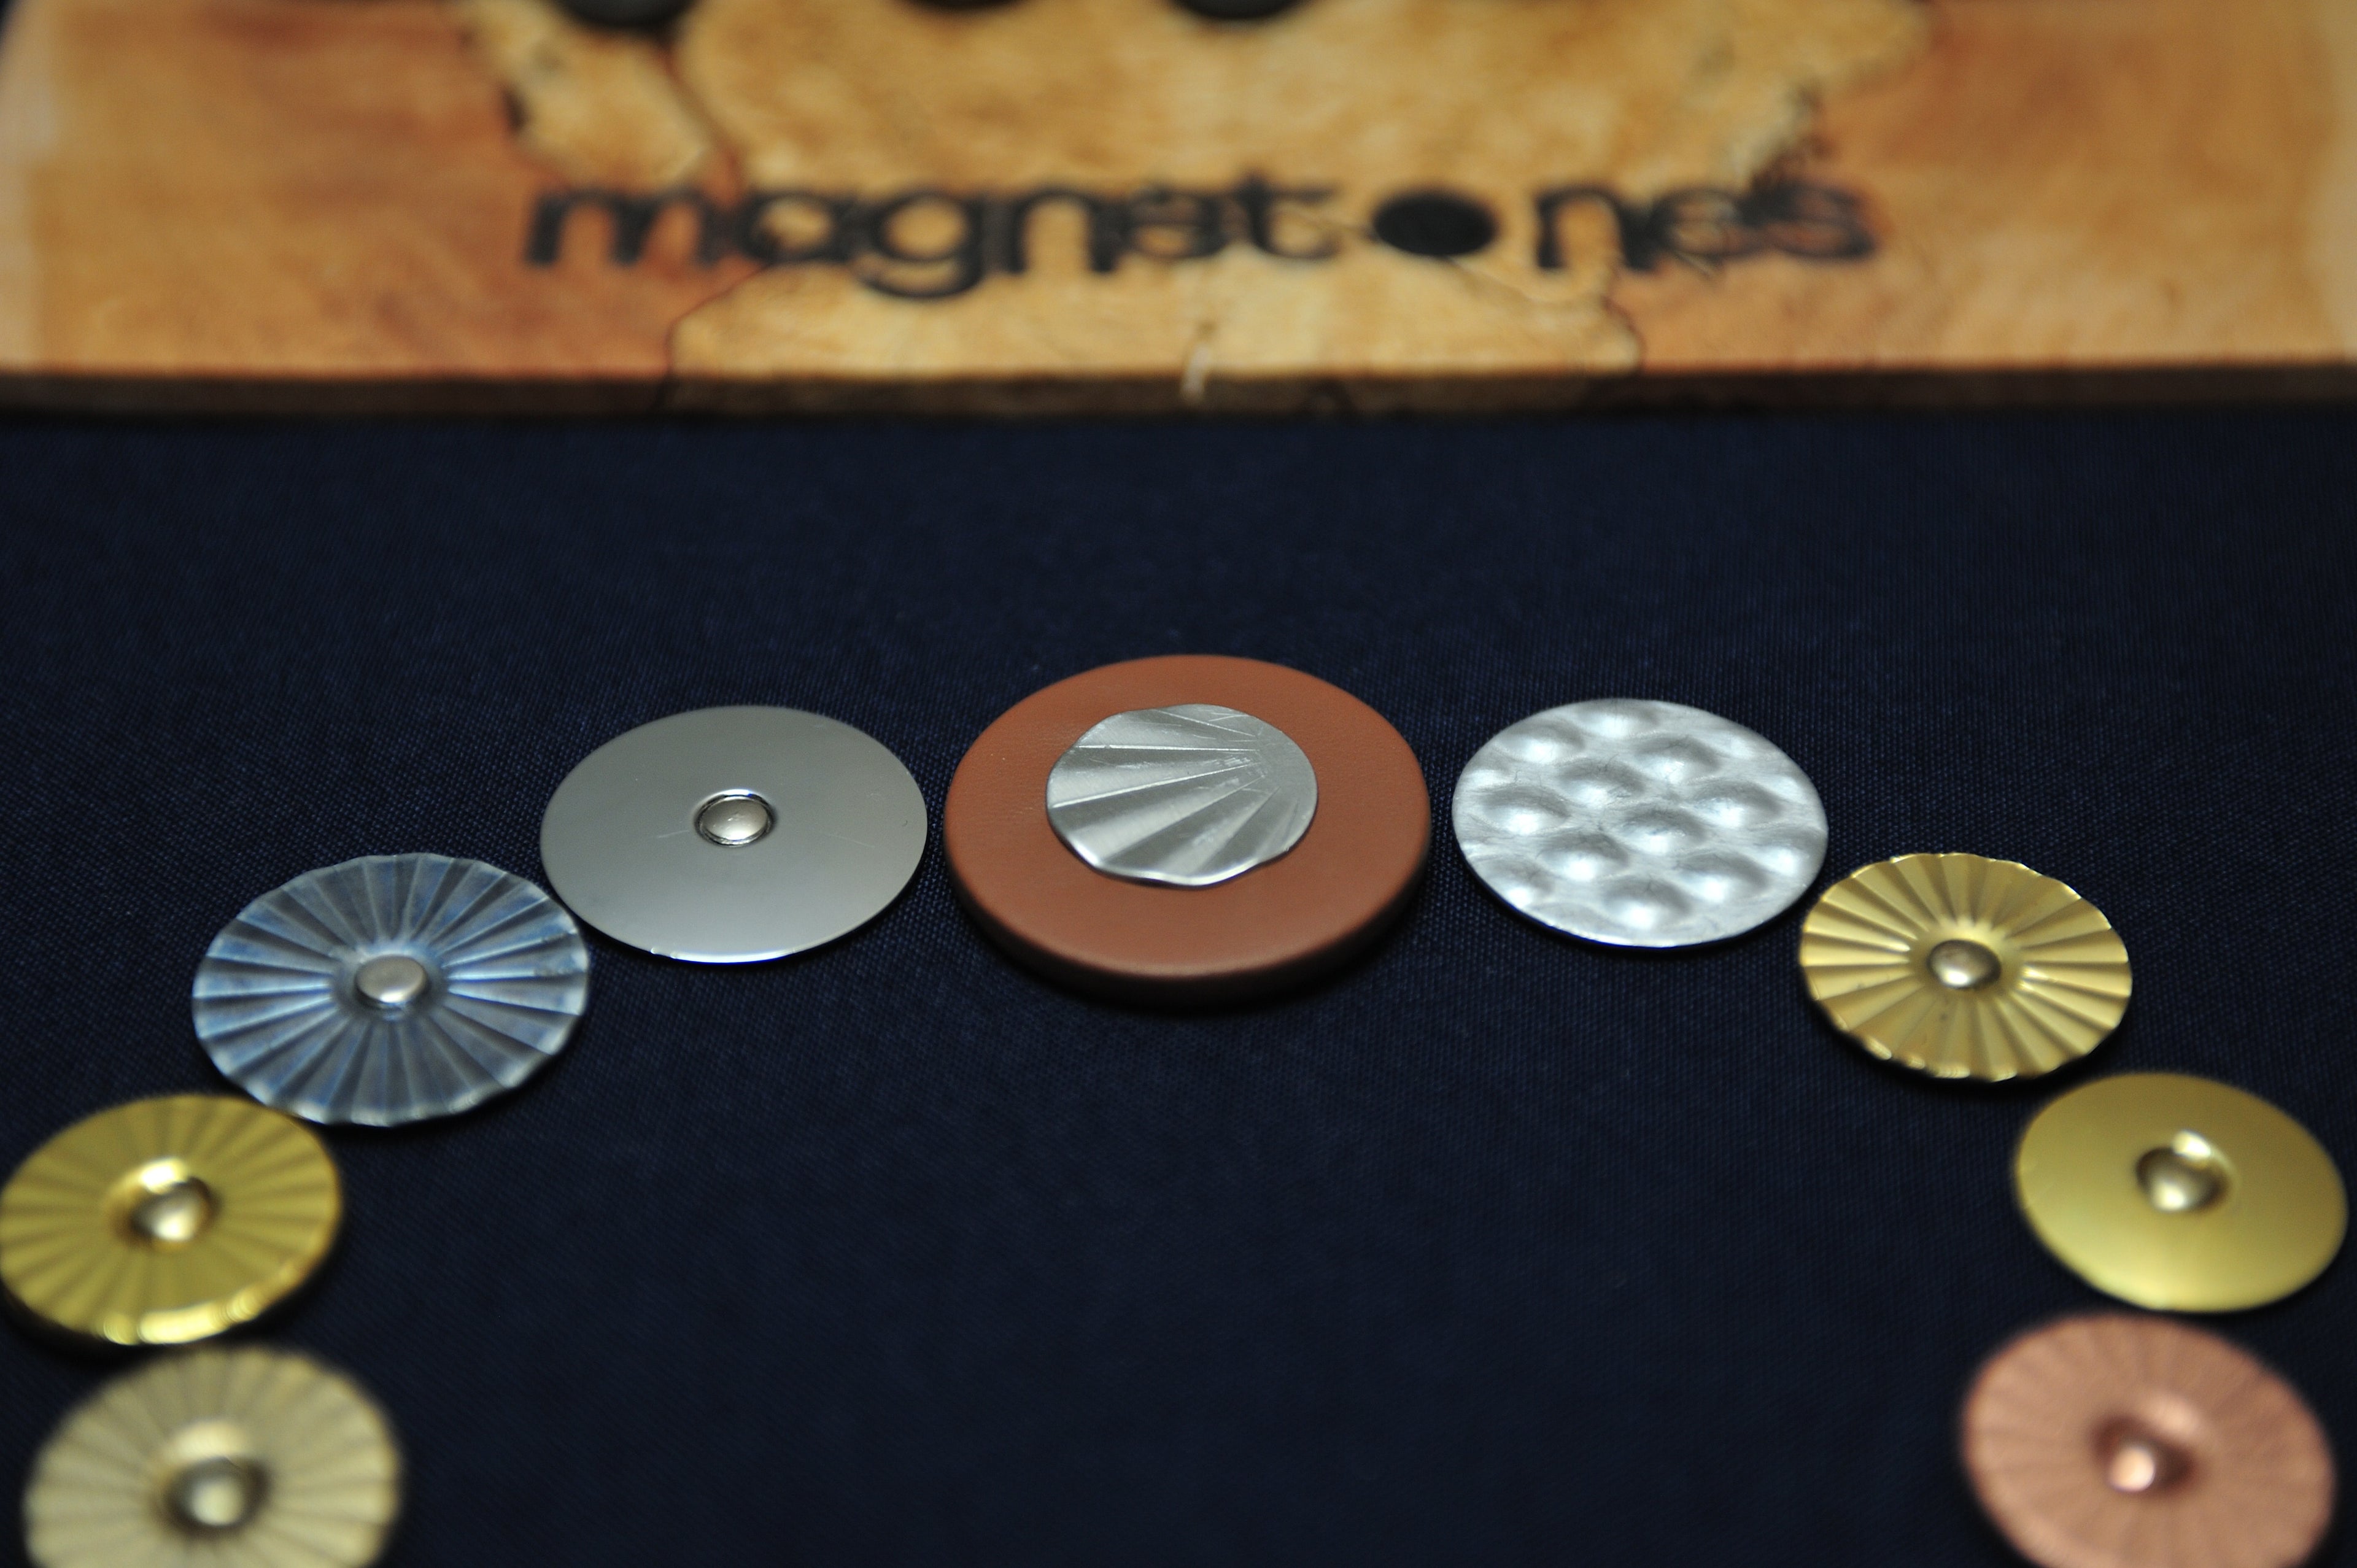
Magnetic Resonators
Magnetic Adapter Rings - Install your own resonators. Ideal for techs with resonator stock.
OR
Pre-Magnetized Resonators - Buy sets already installed. Ideal for players who want to start swapping.
Tools
Buescher True Tone Pad Center Punch
Optional: Aluminum Bench Block - a non-magnetic surface to flatten and cool shellac on
Rivets
Only necessary if you are installing your own resonators on anything that is secured with a metal rivet, such as:
- Flat Metal
- Domed Metal (SA 80 style)
- Maestro/Noyek
Special Pads, Glue, or Resonators?
Nope.
Techs can use their favourite pads and padding technique. I designed these with special attention given to allowing techs to continue doing the good work that you go to them for in the first place. This wouldn't work if I demanded that techs buy and master another style of pad.
Same goes for resonators - if a tech already has resonator stock, I am happy to just sell the magnets to keep their stock minimal. If a tech wants to save time, I can do the installation for them.
Installation
Install Magnetones on an instrument
- Prep your overhaul as normal
- Select pads from your stock without resonators (or remove current resonators)
- Using the Buescher True Tone hole punch, enlarge the hole using the largest punch for the largest magnet, or the smallest punch for the smallest magnet.
- Superglue Magnetic Backing to underside of pad - this keeps the magnet from leaking shellac inside of the pad during seating and adjustment.
- Add shellac or hot glue to the back of the pad as normal. The typical 'business card thickness' will be enough.
- Overhaul the instrument as normal, with or without the resonators installed. Magnetones will not interfere with the quality work you are already doing.
Install Adapter Magnet on your Resonators
- Using a Backing Magnet, insure your Adapter Magnet is in the proper orientation. (Don't glue the resonator to the wrong pole of the magnet).
- Select the right Adapter Magnet for your resonator stem or rivet
- Scuff the surface of the magnet to be glued.
- Run a bead of superglue around the contact area of the resonator.
- Mount magnet to resonator using stem or rivet as a centering guide.
- Let it dry without accelerator.
- Rest this assembly on a magnetic/ferrous surface so that the magnet is continually drawn towards the resonator.
Using Magnetones
Switching your resonators
- Use resonator lifting tool to remove the resonator from each pad
- Drop new resonators in place. The magnetic strength is strong enough to pull them into place without the need to carefully align them.